Swipe News App
Admin panel installtion on server
Admin panel installtion on server
Setup Laravel Admin Panel
Step 1: Upload the Admin Panel Files
-
Download the Admin Panel Files:
- Unzip the admin panel files from the downloaded folder from codecanyon.
-
Upload Files to Server:
- Use an FTP client or the file manager in your hosting control panel (cPanel or hPanel) to upload the unzipped files to your server. Typically, you should upload the files to the
public_htmldirectory or a subdirectory if you prefer.
- Use an FTP client or the file manager in your hosting control panel (cPanel or hPanel) to upload the unzipped files to your server. Typically, you should upload the files to the
Step 2: Create a Database
-
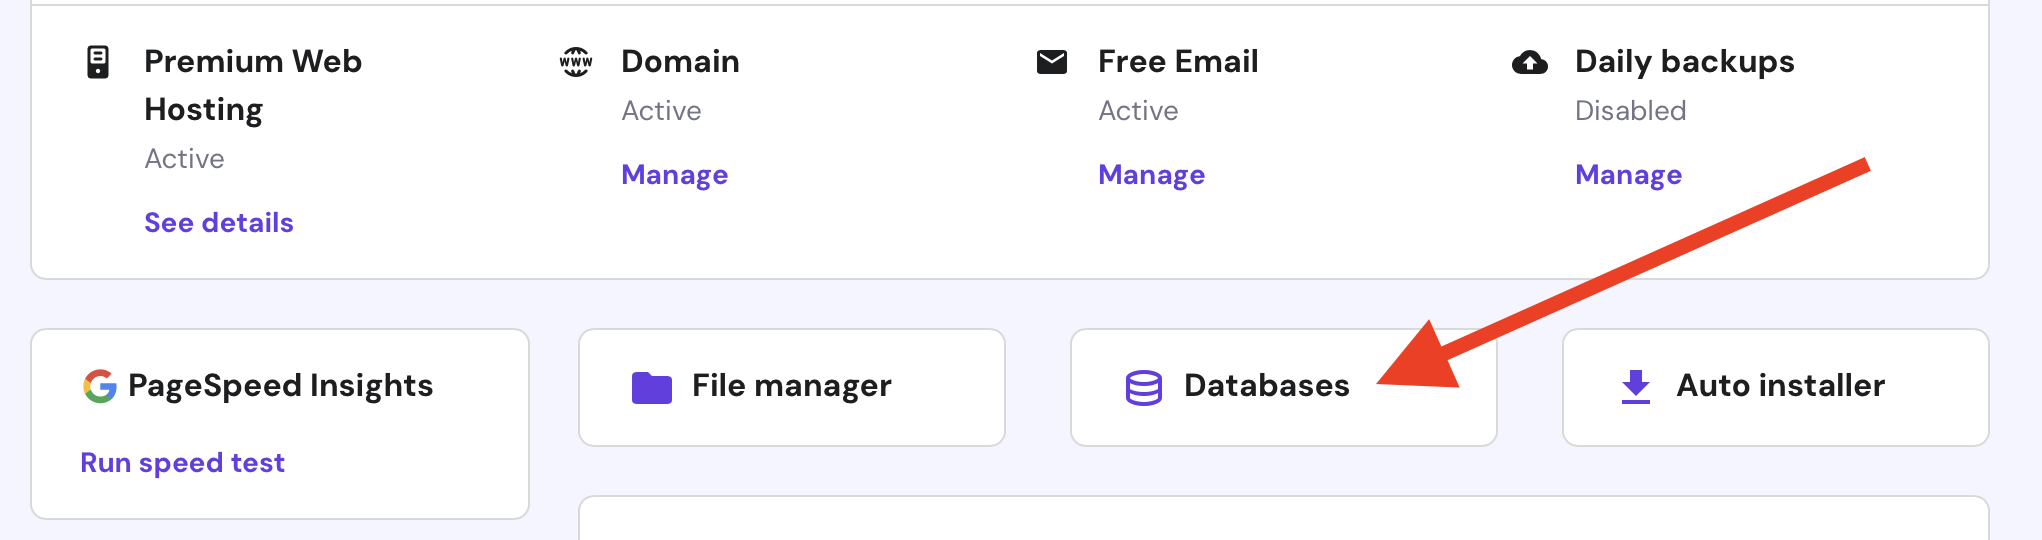
Login to Your Hosting Control Panel:
- Access cPanel or hPanel.
-
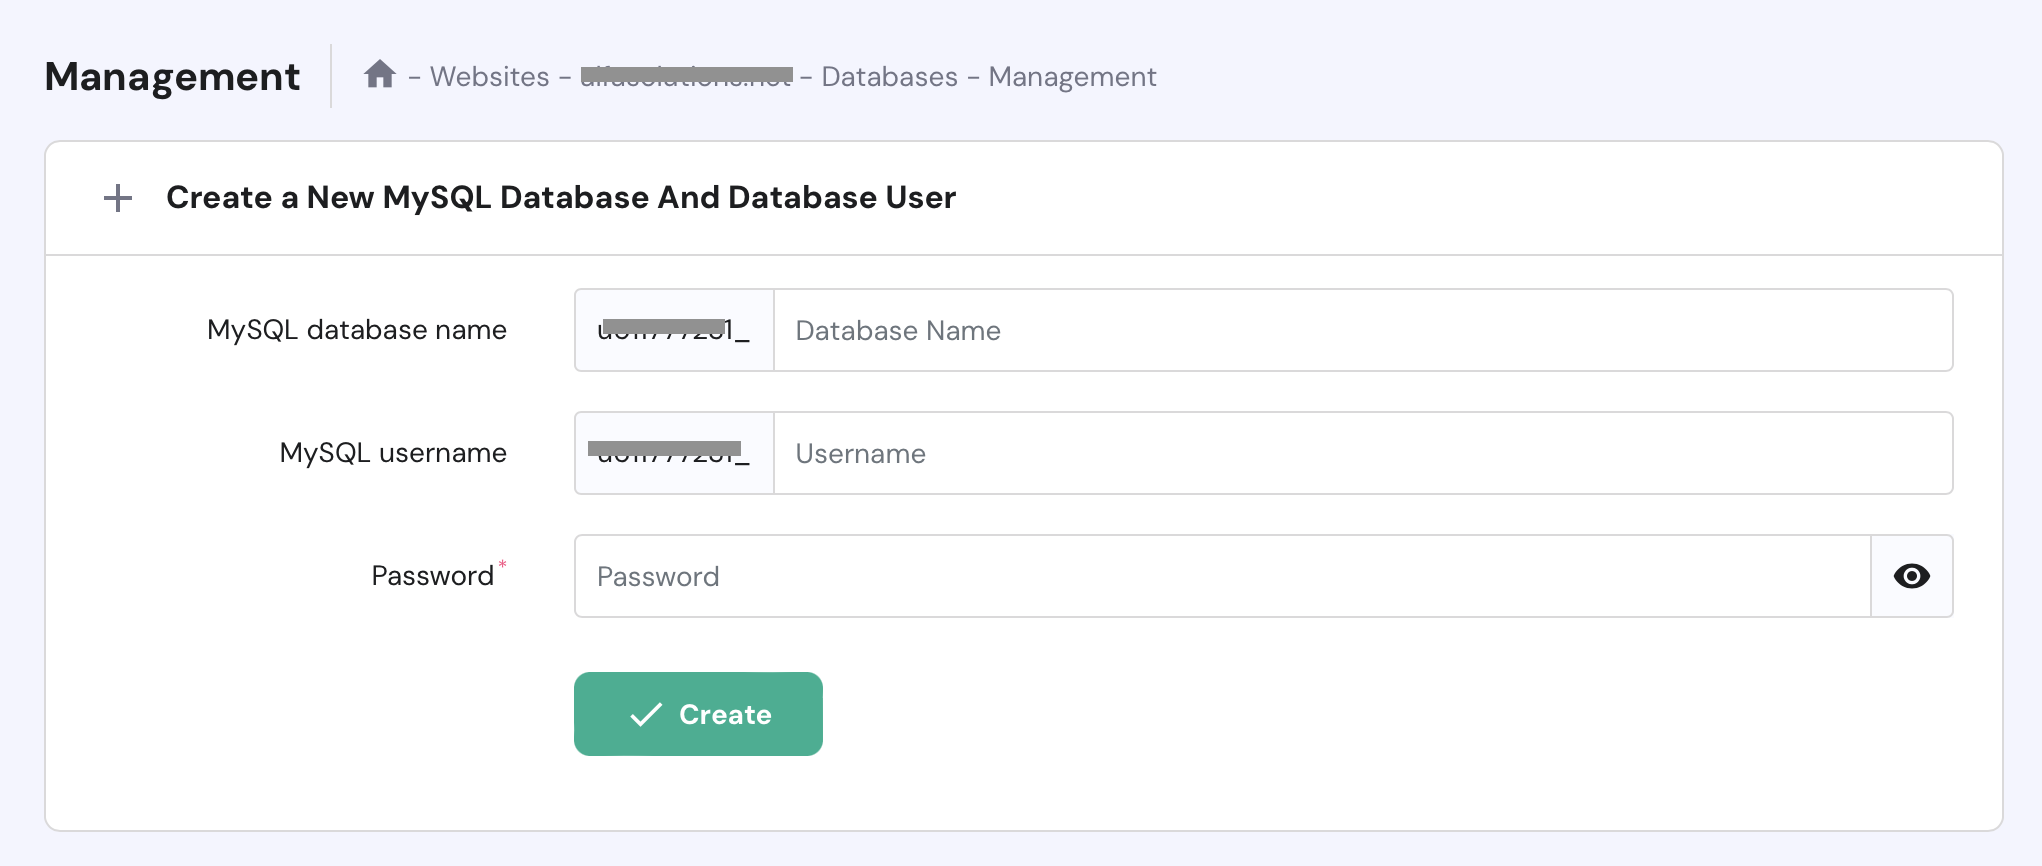
Create a New Database:
- Navigate to the MySQL Database section and create a new database.
- Note down the database name, username, and password as you will need them later.
Step 3: Import the Database
-
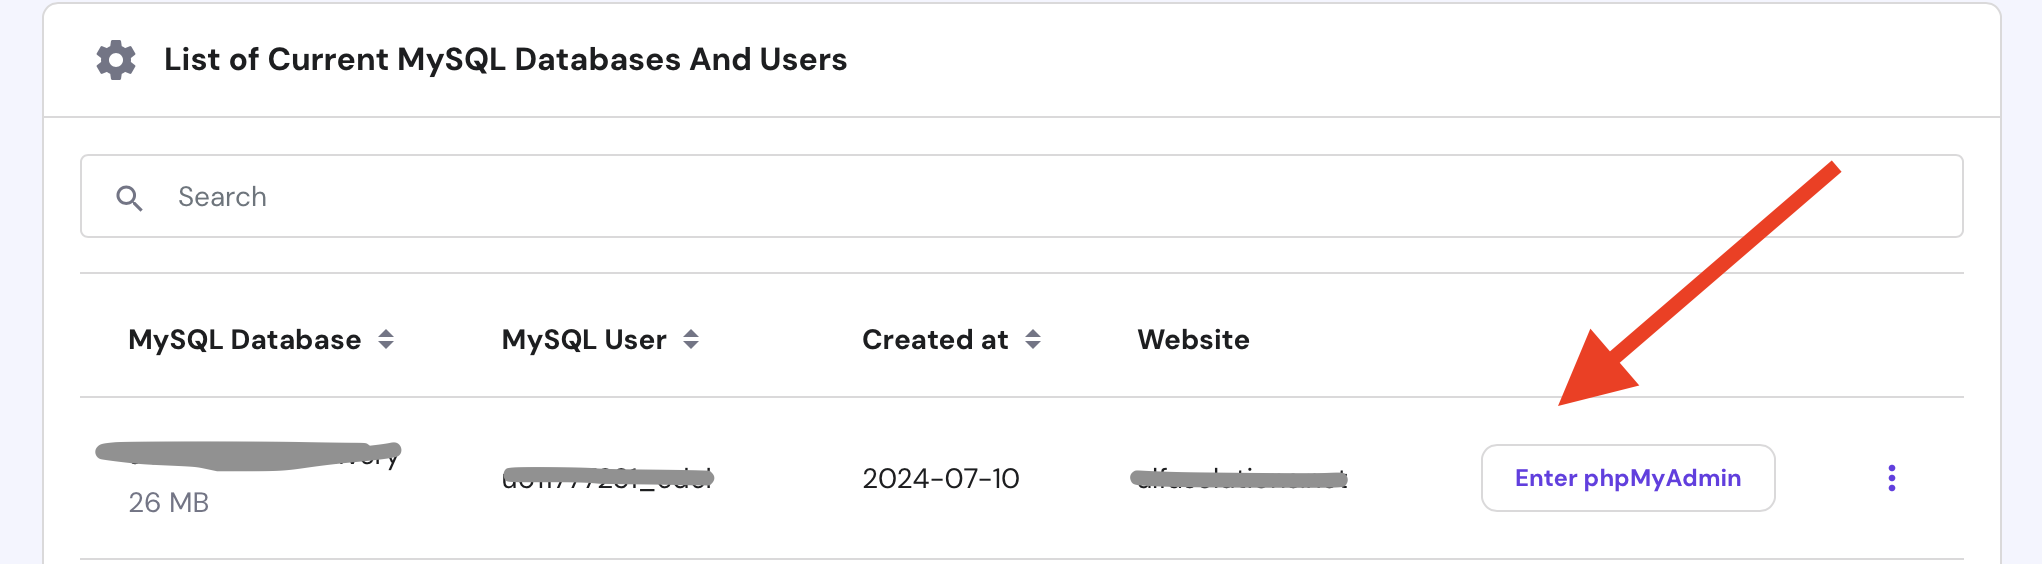
Access phpMyAdmin:
- In your hosting control panel, find and click on phpMyAdmin.
-
Select the Database:
- Choose the newly created database from the list on the left.
-
Import the SQL File:
- Click on the 'Import' tab.
- Choose the provided SQL file from the admin panel package.
- Click on 'Go' to start the import process.

Step 4: Configure the Admin Panel
-
Edit the Environment File:
-
Locate the
.envfile in the root directory of the admin panel files on your server. -
Update the following lines with your database details:
-
DB_CONNECTION=mysql
DB_HOST=127.0.0.1
DB_PORT=3306
DB_DATABASE=your_database_name
DB_USERNAME=your_database_username
DB_PASSWORD=your_database_password
Use your database name, password and username details
Access admin panel
www.yourdomain.com/public/login
Email: admin@gmail.com
Password: 12345678